‘Surface Roughness’ in composite materials
Quite often in the process of manufacturing & fabricating industrial laminates a specific surface roughness is indicated. Be it the purpose of reducing electrical arc tracking across the surface of the composite material, or to make sure the surface is rough enough to hold an adhesive; surface roughness can be a vital component of a machined composite part’s integrity.
A surface, as defined by Merriam-Webster is “n:the exterior or upper boundary of an object or body (1).” Essentially; for the composite world, this is the topography of the sheet or part and the area that typically comes into contact with another apparatus. The surface roughness of the material is a direct result of the manufacturing & fabrication process.
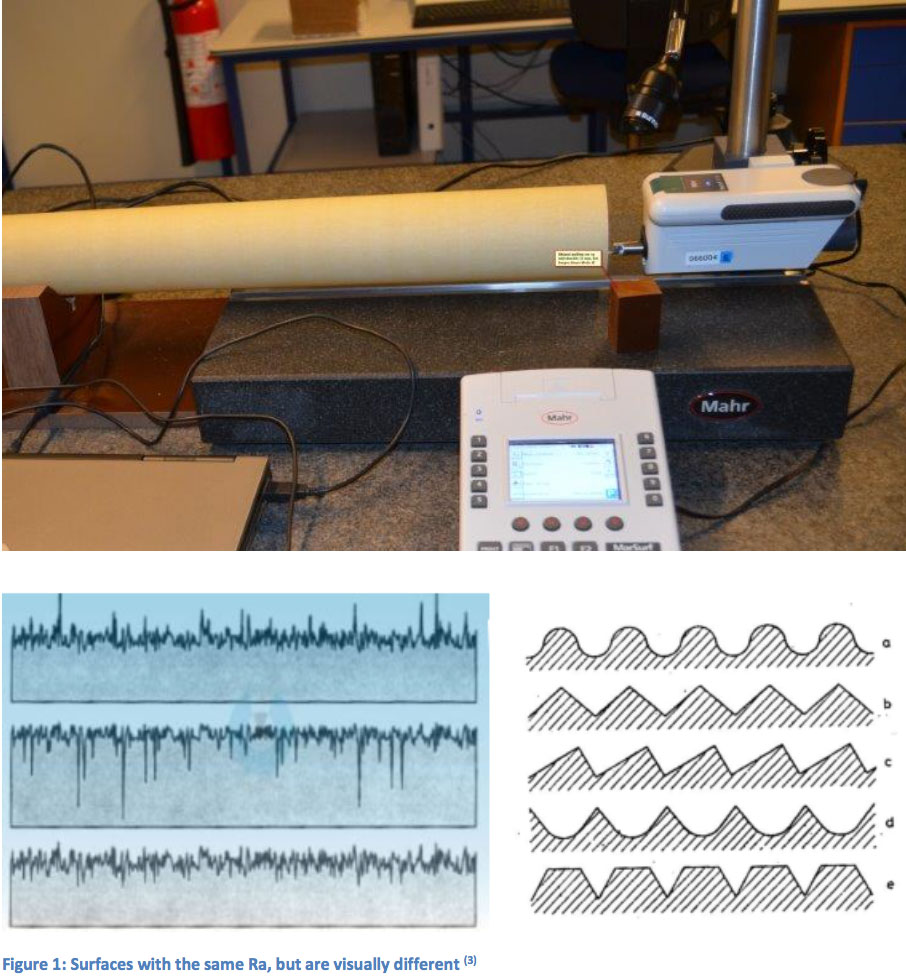
Measuring for surface roughness can be done in a number of ways. The most commonly cited on mechanical drawings is a direct measurement style using instruments consisting of a stylus that glides back and forth over a specified area(2). The peaks and valleys of the stylus are measured and an average is taken for the whole. Below you will find a picture of one of our Lamitex ® tubes being measured in this fashion. The instrument in the photo is measuring the surface roughness in micrometers (μm), equal to 1 millionth of a meter. To give you an idea of how small this is; the average human hair is about 40-75 μm. The average surface roughness is noted on most drawings as ‘Ra’and is known to be most useful when looking at a piece of material as a whole. The Ra is to be understood as an average, however, and not as representative of the visual integrity of a composite. To highlight this; see the figure below describing three materials that have the same recorded Ra,but visually different surfaces (3).

amitex® NEMA grade laminates can be custom manufactured to obtain low or high Ra depending on our customers’ applications. With nearly a century in the composites business, you can trust the expert craftsmanship of our parts to meet your requirements. Contact one of our material specialists today to see how we can help solve your challenges.
ARTICLE SOURCES CITED:
- 1.“Surface.” Merriam-Webster, Merriam-Webster, www.merriam-webster.com/dictionary/surface.
- 2.Xue, Huanran. “Metrology for Manufacturing: Surface Measurement.” Cutting Fluids in Machining, www.mfg.mtu.edu/cyberman/quality/metrology/surface.html.
- 3.Talati, Jigar. Surface Roughness – Significance and Symbol Interpretation in Drawing . Hexagon Design Centre, Vadodara, hexagon@iqara.net.


